Our guide to hanging your new curtains
We do love our curtains here at Tuiss Blinds Online, follow these instructions and you'll hang your new curtains like a professional!
Eyelet Curtains
These curtains will be up in a jiffy!
Feed each eyelet over the pole; make sure that the leading and outside edge of the curtain points inwards towards the window. Position the final eyelet between the bracket and the finial.
There you go, all done, and relax.

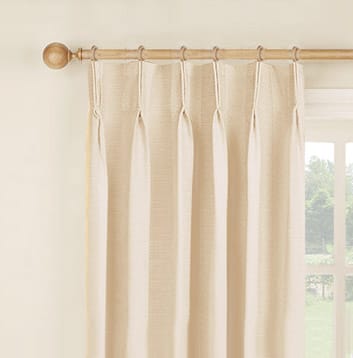
Pinch Pleat Curtains
Pinch pleat curtains are already pleated for you so they will be hanging and looking lovely in a trice.
Decide the Position of the Hooks
All you really need to do is decide where to position the hook that sits at the back of the pleat. If you have a pole then move the hook to the top of the heading, this will make sure your curtain hangs below the pole. For curtain tracks position the hook towards the middle so that the heading will cover the track.
Hanging your Curtains
Make sure that you have the same number of track gliders or pole rings as you have pleats and then simply hook through. If you have a curtain pole attach the final curtain hook between the bracket and the finial and for a curtain track attach it to the fixed glider at the end. All done, sit back and relax.
Pencil Pleat Curtains
If you've never hung pencil pleat curtains before we've made these instructions really detailed to help you, rest assured its common sense rather than rocket science! The key thing here is to just take your time.
Tying the Cords
Tie the cords before you gather! You will need to tie the cords at one end of the heading tape. If you don't do this when you start to gather the curtain the heading tape will unravel and this is never a good thing! Most people like to tie the curtains off at the leading edge, i.e. the edge that will meet the other curtain in the middle.
(Ooops! In the unlikely event that you do accidentally unravel the heading tape then get a tapestry needle to re-thread the cords through the holes.)

Check the Width
Before you start to gather grab a tape measure and check the width that the curtain needs to be. It's worth gathering the curtain to a few centimetres wider than you actually need so that there's no need to yank each side of the curtain to get them to meet in the middle once they are hung!
Gathering
Take hold of the loose cords at the un-tied end and start to pull them. Pull the cords evenly so that the pleats will be nice and straight.
Top-Tip:
![]() It can be easier to check the evenness of the pleats by looking at the heading tape rather than the actual pleats in the curtain.
It can be easier to check the evenness of the pleats by looking at the heading tape rather than the actual pleats in the curtain.
Tie the Curtains off
Once you're happy with the width of the curtain tie the cords. Don't cut the cords though as you may at some point want to loosen the curtain for cleaning or maybe to hang at a different window.
So that the long cords don't keep peeping out at you wind them up over your hand. Some people attach the cords to the lining with a safety pin to really keep them hidden.
Inserting the Hooks (the fun bit!)
At this point take the time to make sure your gathers are nice and even, it takes a little patience but we promise it will be worth it!
Count the number of gliders or rings that you have on your track or pole and then divide by half. This is the number of hooks that you need to attach to each curtain.
Before you put the hooks into the pockets it's worthwhile placing them loosely on top of the heading tape. An even distance between the hooks makes all the difference and will give your curtain a professional edge! Make sure that you place a hook on the outside edge of curtain so that when the curtain is pulled closed it will stays securely at the end of the track or pole. It's worth considering the position of the hook on the leading edge too. Place it so that you can achieve a nice 'overlap' with the other curtain when they are closed.
The heading tape has three rows of pockets. For curtain tracks you will need to insert the hooks into the low or middle row of pockets so that the heading hides the track. For poles insert the hooks into the top row of pockets so that the curtain hangs below the pole. Just make sure you insert the hooks into the pockets rather than onto the cords!
Now just pop the hooks into the pockets on your chosen row.
You're all set to Hang your Curtains (the easy bit!)
It can be easier to hang curtains with a friend who can hold the weight of the curtains while you attach them. If you've gone to all the trouble of creating perfect pleats you don't want them all to move if the curtain hangs in mid-air for a while!
If you have a curtain pole attach the final curtain hook between the bracket and the finial and for a curtain track attach it to the fixed glider at the end.
All done (well done you!)
We're sure your curtains now look magnificent and totally professional. Time for a nice cup of whatever you fancy.
No Tools Needed!
Hanging your new curtains really needn't be a chore. You've already chosen the ideal heading, now it's time to hang them. Whether you've taken the easy route of pencil pleat curtains or the even easier route of eyelets, your curtains will be up in a matter of minutes, completely transforming your home.